A Low-Power Combined Echolink and ATV Server: Unterschied zwischen den Versionen
Dl8rds (Diskussion | Beiträge) |
Dl8rds (Diskussion | Beiträge) (→Installation) |
||
| Zeile 49: | Zeile 49: | ||
[[image:echolinkserver-mit-kuehlkoerper.jpg|400px]] [[image:echolinkserver-frontblende_fertig.jpg|400px]] | [[image:echolinkserver-mit-kuehlkoerper.jpg|400px]] [[image:echolinkserver-frontblende_fertig.jpg|400px]] | ||
| + | |||
[[image:echolinkserver_komplett.jpg|400px]] [[image:echolinkserver_komplett2.jpg|400px]] | [[image:echolinkserver_komplett.jpg|400px]] [[image:echolinkserver_komplett2.jpg|400px]] | ||
Version vom 10. Juli 2009, 03:57 Uhr
Inhaltsverzeichnis
1 Project Overview
Things evolve, and after initial attempts to set up an Echolink relay on basis of OpenWRT, I decided that porting the SVXLink software is a little too time-consuming. And since Intel's ATOM CPUs are available now, it seems reasonable to choose one of those and charge the machine with some more jobs. For this reason, I decided to build some hardware for this scenario:
- act as an Echolink node to let me speak to my buddies from DB0MHB on our working frequency 144.510 MHz.
- record video transmissions from DB0MHB, convert them into something you can stream over the internet and act as a streaming server.
- provide mass storage and act as a playout server for ATV.
- consume as little power as possible to allow permanent cost-efficient operation
This project is a supertarget of the following projects / items, while absoleting some of them.
- Setting up a remote, electrically independent, low power EchoLink relay
- Porting SVXLink to OpenWRT - given up. Using standard Linux instead.
- Building a Linux Ubuntu package of TheLinkBox
- Compiling a TheLinkBox package for OpenWRT - obsoleted
- Compiling a Hamlib package for OpenWRT - obsoleted
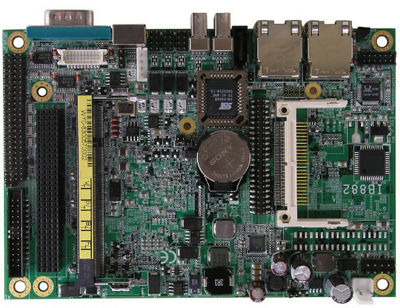
It makes use of the following hardware:
2 Installation
First measurements show that the IB882 using the 530 series Intel ATOM CPU is power-savong, but less than you'd expect. Marketing people said that the power consumption was just at around 4 watts, but this is probably only true for the CPU itself. The rest of the board also consumes some power, and that's quite a bit more than the CPU itself. I measured a current of around 1 Ampere, making about 13,8 Watts total. This, given that the Hauppauge PVR is not yet connected!
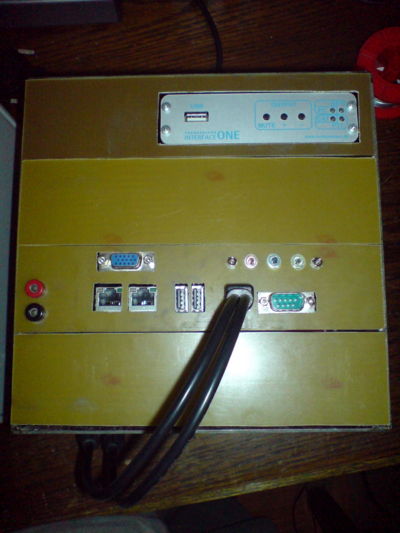
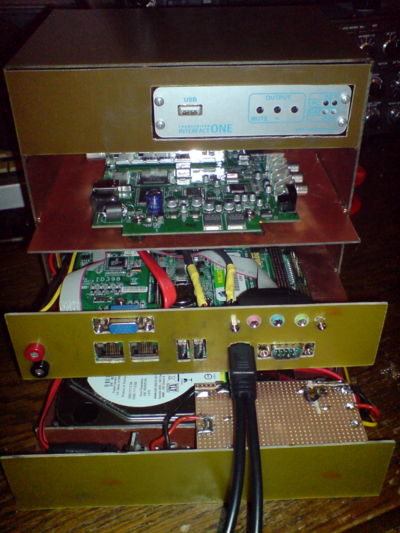
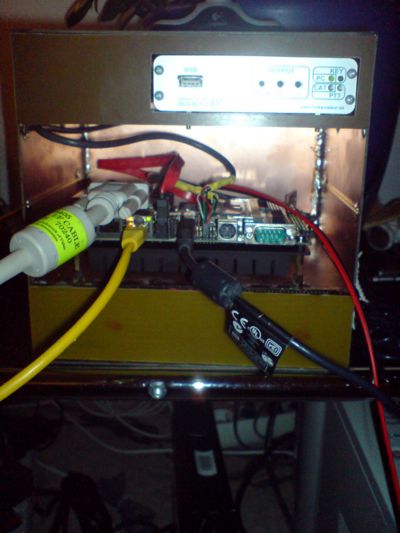
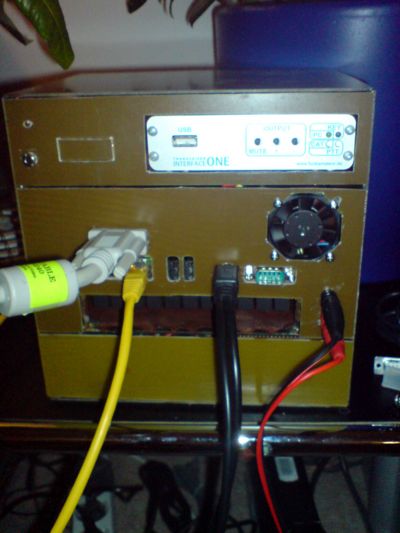
At least, I already built a nice case that will hold the boards. This time, I didn't build a single case for each board, but since several components demanded some housing, I decided to build a big case for four components at a time. In order to keep everything modular and support easy maintenance, I used small U-profiles from RC model construction that allow me to slide the boards in and out. Here are some photos. On the first photos, the connections are not yet completely ready. I still need to drill some holes and attach some sockets.
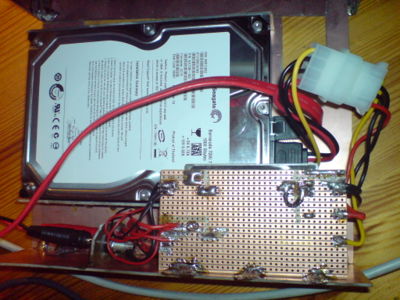
The lower right picture shows the hard disk cage from inside. The striped PCB covers a Cosel DC-DC-converter from 12V to 5V. Since I do not expect to receive an exact voltage of 12V according to the ATX specification here, I am operating two 78S12CV in parallel, which are soldered right onto the drawer, but which are invisible because they are under the Cosel board.
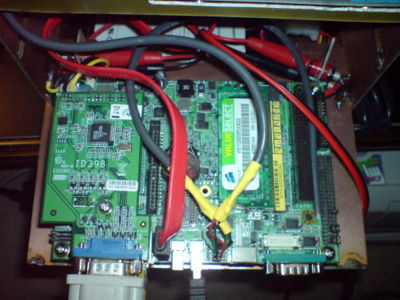
As said, things evolve, and Spectra has sent me a heat sink, because the little board does indeed generate some heat. After the insight that the sink must not reside just on the PCB, but that there must be some circulation below, I understood that the SDIO graphics board will no longer fit in. Either I would have a computer without VGA or a computer box with VGA but without one of the boards on the above photographs.
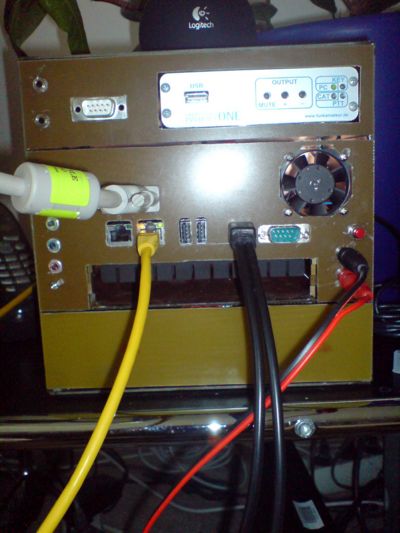
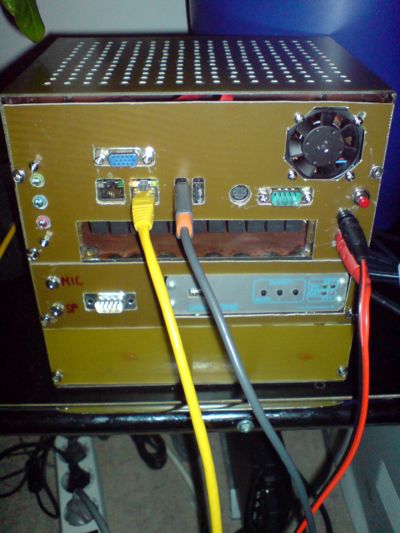
I decided against the Hauppauge board and in favour of the VGA interface, and also in favour of some more sockets on the front panel. Now the hard disk drive is in the lower bay, the transceiver interface is in the upper and the computer resides in the middle.
Here's an overview of the power consumption at 13,8 volts:
2~   A    disk spin up, very short
0.7  A    disk running, computer off
1.8  A    computer running, disk running
1.26 A    computer running, disk put to "sleep" mode
That is still 17,3 Watts with the disk set to sleep. More than I had expected. And it will be 152 kWh per year. That will mount to costs of about 23 Euro per year with an assumed price of 15 ct per kWh.
Please also notice the fan in the right upper corner of the central front panel. It's a 40x40 mm Pabst fan which is driven by a heat-controlled logic and comes up whenever it's becoming too hot within the case. This is only the case when I'm compiling stuff. When the hard disk is sent to sleep, it never comes up. But it is fantastic to see how this fan goes on and off during kernel compilation. Oh, yes, I admit, the octagon for the fan is not so regular after all. I didn't have so much time to measure it precisely. In the end, it works.. and that's what counts here.
The above photographs show the development of the front panel and the entire setup. The rightmost image shows the device as it is complete: It now has the connections for the radio on the upper drawer (2x 3,5 mm jacks, as said above a SubD-9 socket), the sound card jacks, and also the power button on the right hand side.
2.1 Connectivity
In order to connect the transceiver interface to the radio rig, I refer to the C5 standard:
- http://www.chaoswelle.de/CCCCC Chaoswelle Contest Crew Compatible Cabling
Stecker D-Sub 9 polig
pin 1 Ohr links
pin 2 Masse Ohr links
pin 3 Ohr rechts
pin 4 Masse Ohr rechts
pin 5 Masse PTT
pin 6 Mikrofon
pin 7 Masse Mikro
pin 8 +8V (Wenn verfügbar)
pin 9 PTT
Buchse am TRX, Stecker am Headset
In my scenario, I will mount two sockets to my upper section that carries the transceiver interface. One socket will go to the microphone input of the TRX, the other will go to the loudspeaker of my rig.
2.2 Operating System
I managed to get Hardy running and booting from my flash disk. It's a 8 GB flash disk that should provide enough space to home all sorts of data. Today (26.06.2009) I also purchased a 1,5 Terabytes hard disk that will serve as storage.
2.3 Applications
- SVXLink
- I needed to compile it from gound up, but that's not so difficult as it seems. The only really annoying thing is that you can't be sure right away that all your requirements are fulfilled. There are some libraries here and there that need to be installed. And I needed to create a special start script. I think, I'll really port it to Debian.
- video streaming
- The frame grabber I used is a Hauppauge USB-PVR2, which is fairly well supported on Linux. For diverse reasons I had to put it into an external case, but that's not so bad either. When connected via USB, given that the necessary drivers and the firmware has been loaded, I can simply issue the following commands
$> v4l2-ctl --list-inputs -d0  # this will give me all the input channels for the card
ioctl: VIDIOC_ENUMINPUT
       Input   : 0
       Name    : television
       Type    : 0x00000001
       Audioset: 0x00000000
       Tuner   : 0x00000000
       Standard: 0x0000000000000000 ( )
       Status  : 0

       Input   : 1
       Name    : composite
       Type    : 0x00000002
       Audioset: 0x00000000
       Tuner   : 0x00000000
       Standard: 0x0000000000000000 ( )
       Status  : 0

       Input   : 2
       Name    : s-video
       Type    : 0x00000002
       Audioset: 0x00000000
       Tuner   : 0x00000000
       Standard: 0x0000000000000000 ( )
       Status  : 0

       Input   : 3
       Name    : radio
       Type    : 0x00000001
       Audioset: 0x00000000
       Tuner   : 0x00000000
       Standard: 0x0000000000000000 ( )
       Status  : 0

$> v4l2-ctl --set-input 1 -d0  # this will set the input to composite video
and when I now connect a little camera to the composite interface, I can very easily produce an MPEG-encoded movie.
$> cat /dev/video0 >> /home/movie.mpg
The same works with the input source nr. 0 (television) with which you can record TV movies. But we're not doing TV experiments. Instead, we're interested in ATV streaming.
Have a look here: http://forum.ubuntuusers.de/topic/ich-will-hauppauge-wintv-pvr-usb2-unter-hardy/
But what I finally want is to stream a real picture. The application "vls" is good for that:
The config for vls is this:
# vls.cfg (VLS configuration file)
# Example of the VideoLAN HOWTO for Hauppauge USB-PVR2 encoding cards

begin "inputs"
 pvr0       = "video"
end

begin "input"
 trickplay = "normal"
end

begin "pvr0"
 # This card is a Hauppauge USB-PVR2
 cardtype      = "pvr"
 # Device name
 device        = "/dev/video0"
 # Stream type
 type          = "mpeg2-ps"
 # Norm: put "pal", "secam" or "ntsc"
 norm          = "pal"
 # Framerate: put "30" for NTSC and "25" for PAL and SECAM
 framerate     = "25"
 # Input number: put - "0" for Composite on S-video plug
 #                    - "4" for tuner
 #                    - "6" for S-video on S-video plug
 inputnumber   = "1"
 # If you use the tuner, put the frequency
 frequency     = "567250"
 # Image size: put "widthxheight" or "subqcif" (128x96) or "qsif" (160x120)
 # or "qcif" (176x144) or "sif" (320x240) or "cif" (352x288) or "vga" (640x480)
 size          = "720x576"
 # Bitrate in Kbit/s
 bitrate       = "7000"
 # Maximum bitrate in Kbit/s
 maxbitrate    = "9000"
 # Bitrate mode: put "cbr" (constant bitrate) or "vbr" (variable bitrate)
 bitratemode   = "vbr"
end

begin "channels"
 channel1       = "network"
end

begin "channel1"
 # Unicast or multicast IP address
 dsthost = "192.168.178.27"
 # Destination port
 dstport = "1234"
 # If it's a multicast IP address, uncomment the line below
 #type    = "multicast"
 # If it's a multicast IP address, set the "Time To Live" below
 #ttl     = "12"
end

begin "launchonstartup"
 command1 = "start video channel1 pvr0"
end
Then simply start vls with this command:
$> vls -vv -f vls.cfg
Once everything is fine, you can omit the "-vv" since it just controls verbosity.
More information is there: http://www.videolan.org/doc/videolan-howto/de/ch07.html
2.4 Setting up audio
Once again, it is recommendable to follow the instructions given here:
3 Operation
As of today (2009-07-02) I have applied for a test callsign with which I can then operate my little device. Let's see what the federal networks authority (Bundesnetzagentur) is saying.
