Setting up a 70cm AX25 based IP link
The goal of this project is to try out AX25 based IP networking, with the special challenge that the computing endpoints must be very efficient on power consumption. Since I have made good experiences with using ASUS WL-500gP routers operating OpenWRT, this IP link should be based on the same hardware. The AX25 based link is meant to act as a fallback link for the WIFI connection between DL8RDS and DB0MHB
Inhaltsverzeichnis
1 Hardware
1.1 DL8RDS side
- ASUS WL-500GP
- TNC2Multi
- (Transceiver still unclear)
1.2 DB0MHB side
- ASUS WL-500GP
- TNC2H
- T7F, 70cm highspeed data transceiver
2 Project phases
2.1 Building suitable cases
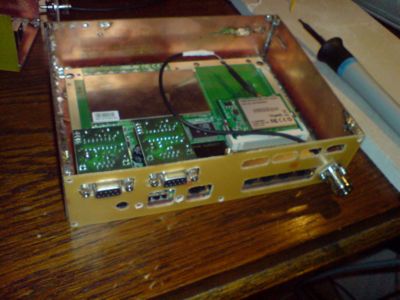
In my first attempt to work with ASUS WL-500gP hardware, unfortunately USB connections were destroyed due to excessive soldering temperature. Damn it, the PCB leads are so thin meanwhile, you can't really work with a normal 15 watts soldering iron any more. Since the router at DB0MHB is meant to steer some other radio devices over USB connections, I decided to invest some money in a new board and use the old board with the single USB socket on my side where I won't need to control any special radio hardware.
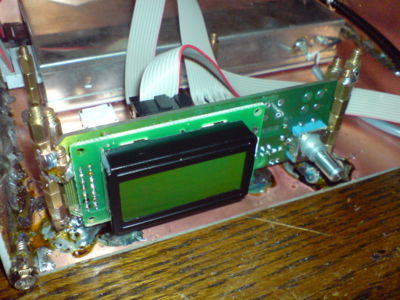
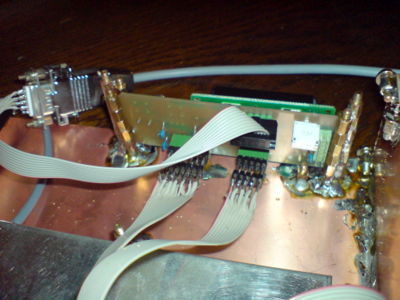
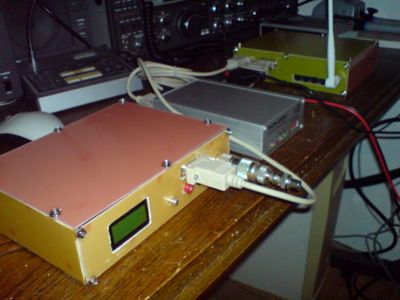
But given that I have consistent experience with PCB based case building in the meantime, the case for the new router is not so much of a challenge any more. The bigger challenge is to build a case for the T7F. I bought it just as a kit, which means that the core device is just contained in a little box with some pins coming out on the front side. On the pins you would plug the user interface, which again is just an open PCB board with a LCD display and a rotating switch mounted on it. As everything should go into a 15cmx10cmx5cm case and the user interface in front, I was to decide how to mount everything together. A short glance in my computer components assembly box told me that the little spacer mounting screws for mainboards are perfectly siuted to construct a fixing apparatus for the interface board. Here's a picture:
It is clear that the T7F above will work on the DB0MHB side. As of now, it is still unclear which transceiver technology will be used on my side. Since I bought another T7F without a GUI, I might give it a try again, since there's that OM Erich Linsmeier DL2RCG who has developed an enhanced T7F GUI. Let's see.
2.2 Getting all the connections right
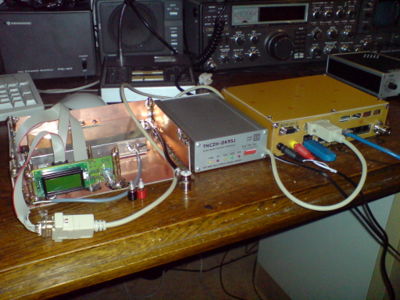
Making sure that all the plugs and sockets fit together the right way is always the most error prone activity, especially if it's all about digital lines: There's no "works a little better" but only "does work or does not". And it only works if you get multiple connections right at the same time. Here's a good panorama of the entire scenario. The left side shows a pre-final stage of my T7F with the front panel still missing.
The other side will look pretty much the same, except that the modem will be a TNC2Multi and the transceiver will look different. But in principle, the workings are identical.
2.3 Getting the software right
After some lengthy trying to compile OpenWRT trunk with all sorts of incompatibilities and instabilities, I asked Jann Traschewski DG8NGN what about the current status of AX25 in trunk, and he strongly advised me to take the easier way first, and he was right. He suggested to install a plain standard Kamikaze 7.09 Openwrt and go ahead from there on. Since I already had a running OpenWRT on the box, I didn't need to go through the flashing cacle by pressing some buttons, but I could take the easy way: Being logged in, I just did that:
on the router-> "cd /tmp"
on the router-> "wget http://downloads.openwrt.org/kamikaze/7.09/brcm47xx-2.6/openwrt-brcm47xx-2.6-squashfs.trx"
on the router-> "mtd erase nvram"
on the router-> "mtd -e linux -r write openwrt-brcm47xx-2.6-squashfs.trx linux"
And after a few minutes I could observe the box rebooting through my serial connection to my router's /dev/ttyS0. Then the standard procedure
- fixing the IP address in /etc/config/network
- fixing the nameserver entry in /etc/resolv.conf: entering the line "nameserver 213.133.99.99" (pick your best nameserver IP here)
- installing the USB kernel modules so that the router can handle external USB storage (I decided to work with a 4GB flash disk)
- installing minicom to check if the TNC2H responds - yes it does after setting the connection properties (Minicom: ctrl-a z o, ttyS1, 34800, 8n1, no flow control at all)
And then I could start to configure the AX25 properties. Big thanks again to Jann for all his advice. First my /etc/ipkg.conf:
src release http://downloads.openwrt.org/kamikaze/7.09/brcm47xx-2.6/packages
src packages http://downloads.openwrt.org/kamikaze/packages/mipsel
src dg8ngn-packages http://db0fhn-i.ampr.org/openwrt/kamikaze/packages/mipsel
src dg8ngn-release http://db0fhn-i.ampr.org/openwrt/kamikaze/7.09/brcm47xx-2.6/packages

dest root /
dest ram /tmp
dest opt /opt
Please note the line with the dg8ngn-release. This source provides special modules since we are using kernel 2.6 here. If you are interested to go into detail, please read this:
After updating the ipkg cache with "ipkg update", you can start to install all the AX25 code:
ipkg install kmod-ax25-dg8ngn ax25-essentials ax25-helpers ax25-libax25 ax25-netrom-rose
maybe that's a little much at first, but since there's still plenty of space on my ASUS, I just did that. And then just follow the hints given on this page:
It will give you all the necessary installation instructions on how to get AX25 up and running. This page is also quite helpful:
