Red Pitaya Remote Receiver Station
Inhaltsverzeichnis
1 Project Scope
The goal of this project is to set up a remote controlled shortwave receiver station that is connectable via HAMNET.
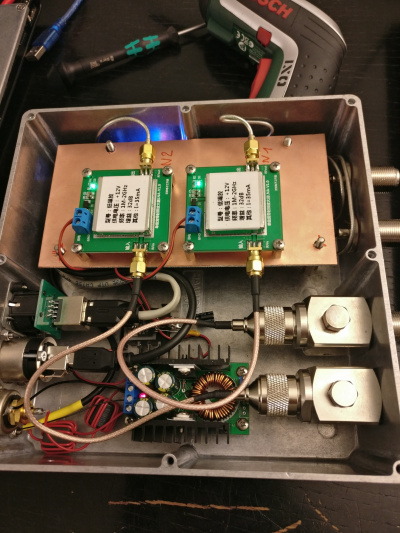
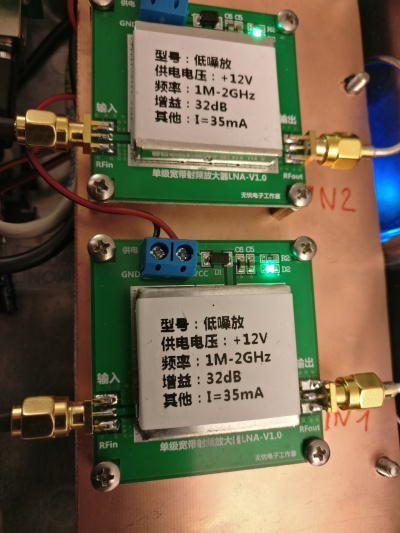
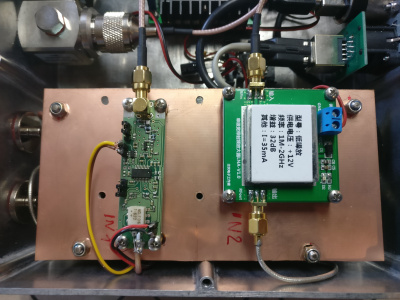
First, I installed two Chinese wideband preamplifiers. Later I heard that there was a special kit from Box73 / FUNKAMATEUR that did the job much better. My observation with the Chinese preamp was that the input of the SDR was highly overloaded, so I needed one with an adjustable amplification. Please check the instruction: http://www.box73.de/download/bausaetze/BZ-100.pdf
Once deployed, I understood that I needed to install Pavel Demon's firmware. Since the deployment at DB0MHB is a little out of reach, I needed to log into my Red Pitaya and make sure that the installation files go to the right place. I decided to build a deb package so that this job was easier.
The final goal is to have a recording / monitoring receiver that can fully be remote-controlled. The Pitaya can be switched on and off with the remote control switch described here: A relay box for control from Linux and A remote Ethernet switch for my relay box
Note: Big Thanks to Johannes DO6JS, who finally found out the last tricks to get everything running.
2 Component List
- Aluminium diecast case HAMMOND 1550F: 50 €
- Red Pitaya: 235 €
- Neutrik socket Cinch (power supply): 10 €
- Neutrik socket USB thru: 10 €
- Neutrik socket Ethernet thru: 10 €
- 25cm USB cable: 2 €
- 2x Telegärtner Lightning protection: 2x 50 €
- 2x pigtail N-SMA: 5 €
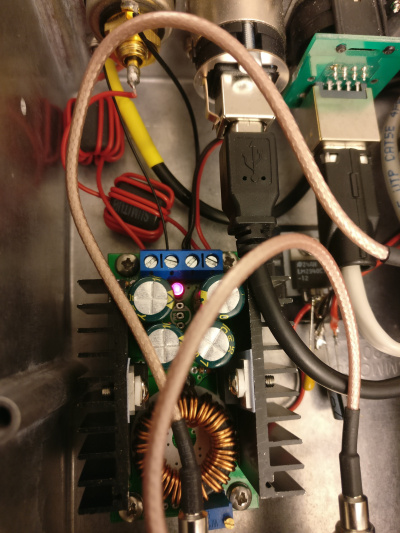
- DC DC Converter: 10 €
- Chinese wideband preamplifier: 10 €
- FUNKAMATEUR preamplifier specially designed for Red Pitaya: 50 €
- Teflon cable with SMA plug: 5 €
- Semi Rigid SMA/SMA: 5 €
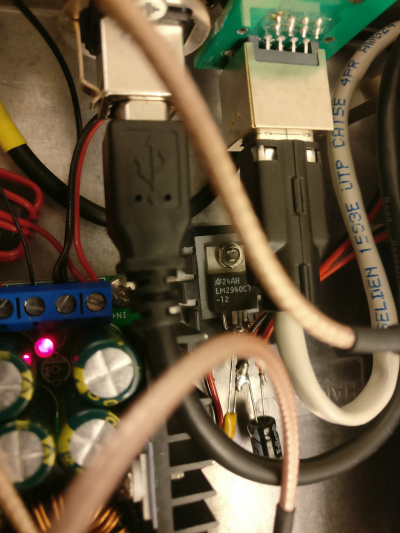
- Voltage Limiter IC for 12V: 3 €
- LM2940L-12 ensuring that possible input voltage spikes will not damage my preamp
- 2x Ferrite Core: 3 €
- 2x N socket with pigtail: 10 €
- 1 PCB: 1 €
- M4 spacers: 5 €
- M3 spacers: 5 €
Overall total: 529 €
3 Software Stuff
3.1 Accessing the amplifier
First detect the preamp:
i2cdetect -y -r 0
     0  1  2  3  4  5  6  7  8  9  a  b  c  d  e  f
00:          -- -- -- -- -- -- -- -- -- -- -- -- --
10: -- -- -- -- -- -- -- -- -- -- -- -- -- -- -- --
20: -- -- -- -- -- -- -- -- -- -- -- -- -- -- -- --
30: -- -- -- -- -- -- -- -- -- -- -- -- -- -- -- --
40: -- -- -- -- -- -- -- -- -- -- -- -- -- -- -- --
50: UU -- -- -- -- -- -- -- -- -- -- -- -- -- -- --
60: 60 -- -- -- -- -- -- -- -- -- -- -- -- -- -- --
70: -- -- -- -- -- -- -- --
60h is the address of the preamp.
Now read out the dac register as word:
i2cget -y 0 0x60 0 w
0x80c0
Set the amplification to max:
i2cset -y 0 0x60 0 0xC0 0x0f 0xff i
Set the amplification to min:
i2cset -y 0 0x60 0 0xC0 0x0 0x0 i
Values between 0 and 4095 are possible. Convert to hex.
3.2 UNSUCCESSFUL: Getting the interface right
Firstly, unless there is some special configuration on the Pitaya, you should be able to detect ot from another machine.
In our case, we are using a Raspberry Pi for OpenWebRX and the Pitaya for receiving.
This is some background info, but not applicable in our case since we are using the Soapy toola below...:
http://pavel-demin.github.io/red-pitaya-notes/sdr-receiver/
So we needed to implement this on the Raspberry Pi:
#Installing SoapySDR:
git clone https://github.com/pothosware/SoapySDR
cd SoapySDR
mkdir build
cd build
cmake ..
make
sudo make install
sudo ldconfig
cd ..
#Installing rx_tools:
git clone https://github.com/rxseger/rx_tools
cd rx_tools
mkdir build
cd build
cmake ..
make
sudo make install
sudo ldconfig
cd ..
git clone https://github.com/pothosware/SoapyRedPitaya.git
cd SoapyRedPitaya
mkdir build
cd build
cmake ..
make
sudo make install
git clone https://github.com/pothosware/SoapyRemote.git
cd SoapyRemote
mkdir build
cd build
cmake ..
make
sudo make install
I also decided to install the remote component on the Red Pitaya, just the same way as given above.
Please check the following link for instructions:
https://github.com/pothosware/SoapyRemote/wiki
The detection should work then on the Raspberry Pi with the following command. Note that the IP 44.225.41.10 is our Red Pitaya.
SoapySDRUtil --probe="driver=redpitaya, addr=44.225.41.10"
giving the following result:
######################################################
## Soapy SDR -- the SDR abstraction library
######################################################

Probe device driver=redpitaya, addr=44.225.41.10

----------------------------------------------------
-- Device identification
----------------------------------------------------
  driver=redpitaya
  hardware=redpitaya

----------------------------------------------------
-- Peripheral summary
----------------------------------------------------
  Channels: 1 Rx, 1 Tx
  Timestamps: NO

----------------------------------------------------
-- RX Channel 0
----------------------------------------------------
  Full-duplex: YES
  Supports AGC: NO
  Stream formats: CF32
  Native format: CF32 [full-scale=1]
  Full gain range: [0, 0] dB
  Full freq range: [0.05, 60] MHz
    RF freq range: [0.05, 60] MHz
  Sample rates: 0.02, 0.05, 0.1, 0.25, 0.5, 1.25 MSps

----------------------------------------------------
-- TX Channel 0
----------------------------------------------------
  Full-duplex: YES
  Supports AGC: NO
  Stream formats: CF32
  Native format: CF32 [full-scale=1]
  Full gain range: [0, 0] dB
  Full freq range: [0.05, 60] MHz
    RF freq range: [0.05, 60] MHz
  Sample rates: 0.02, 0.05, 0.1, 0.25, 0.5, 1.25 MSps
Alternatively I installed SoapyRemote on the RedPitaya and it seems I can access it additionally through the remote driver:
root@db0rc:~# SoapySDRUtil --find="remote=44.225.41.10, remote:driver=redpitaya"
######################################################
## Soapy SDR -- the SDR abstraction library
######################################################

Found device 0
  driver = remote
  remote = tcp://44.225.41.10:55132
  remote:driver = redpitaya
3.3 UNSUCCESSFUL: Getting OpenWebRX to connect to the Red Pitaya
Since we now can access the Pitaya via a standard interface, it's time to configure OpenWebRX accordingly:
The following link will provide some partly applicable support:
https://github.com/simonyiszk/openwebrx/wiki/Setting-up-OpenWebRX-on-a-Raspberry-Pi-2
This is also helpful:
https://forum.redpitaya.com/viewtopic.php?f=8&t=1911
And this is extremely helpful:
https://github.com/pothosware/SoapySDR/wiki
Even though I don't know for now if the SoapyRemote was really necessary, I was able to find the pitaya with the command
SoapySDRUtil --find="driver=redpitaya, addr=44.225.41.10"
I can also find the RedPitaya with the command
SoapySDRUtil --probe="remote=tcp://44.225.41.10:55132,driver=redpitaya"
Now it's necessary to inject this kind of configuration into the OpenWebRX config. Therefore I had to "make" the device:
SoapySDRUtil --make="remote=tcp://44.225.41.10:55132,driver=redpitaya"
... Resulting in the creation of a device with the index 0:
Here is what I entered in the section "I/Q sources":
soapy_device_query="0" #can be a number or can correspond to a driver, e.g. soapy_device_query="driver=hackrf", see `rx_sdr --help`
start_rtl_command="rx_sdr -d {device_query} -F CF32 -s {samp_rate} -f {center_freq} -p {ppm} -g {rf_gain} -".format(device_query=soapy_device_query, rf_gain=rf_gain, center_freq=center_freq, samp_rate=samp_rate, ppm=ppm)
format_conversion=""
The execution of the following command gives me an error:
rx_sdr -d "0" -F CF32 -s 1250000 -f 7000000 -p 0 -g 5 -
WARNING: sync read failed. -5
WARNING: sync read failed. -5
WARNING: sync read failed. -5
3.4 SUCCESSFUL: Getting the interface right
After the lacking success of the above approach, and after around a year of inactivity I finally succeeded after Johannes DO6JS helped me to find out the real tricks.
3.4.1 Running the right firmware
The correct firmware that's required to run on the RedPitaya is Pavel Demin's SDR transceiver code.
root@rp-fxxxxx:/etc# cat rc.local
#!/bin/sh -e
#
# rc.local
#
# This script is executed at the end of each multiuser runlevel.
# Make sure that the script will "exit 0" on success or any other
# value on error.
#
# In order to enable or disable this script just change the execution
# bits.
#
# By default this script does nothing.


dir=/opt/redpitaya/www/apps/sdr_transceiver
cat $dir/sdr_transceiver.bit > /dev/xdevcfg
. $dir/start.sh

exit 0
This file will start an FPGA data interface on the port 1001, whenever the Red Pitaya boots up.
root@rp-fxxxxx:/etc# netstat -tulpen
Active Internet connections (only servers)
Proto Recv-Q Send-Q Local Address           Foreign Address         State       User       Inode       PID/Program name
tcp        0      0 0.0.0.0:1001            0.0.0.0:*               LISTEN      0          4679        1609/sdr-transceive
tcp        0      0 0.0.0.0:1002            0.0.0.0:*               LISTEN      0          5153        1610/sdr-transceive
After a reboot, the Pitaya should come up and have the sdr transceiver up and running. This is all that needs to be done to the Red Pitaya.
3.5 SUCCESSFUL: Getting OpenWebRX to connect to the Red Pitaya
On our Banana Pi, running OpenWebRX is also quite simple. Here is how it's started:
root@db0mhb:/etc# cat rc.local
#!/bin/bash
#
# rc.local
#
# This script is executed at the end of each multiuser runlevel.
# Make sure that the script will "exit 0" on success or any other
# value on error.
#
# In order to enable or disable this script just change the execution
# bits.
#
# By default this script does nothing.

PATH=/sbin:/usr/sbin:/bin:/usr/bin
export PATH=/usr/local/sbin:/usr/local/bin:/usr/sbin:/usr/bin:/sbin:/bin

#... other code

#... other code

tmux new -d -s openwebrx-session 'bash -c "cd /usr/local/git/openwebrx; ./openwebrx.py; bash"'

exit 0
Here are the contents of the configuration file:
# -*- coding: utf-8 -*-

"""
config_webrx: configuration options for OpenWebRX

    This file is part of OpenWebRX,
    an open-source SDR receiver software with a web UI.
    Copyright (c) 2013-2015 by Andras Retzler <randras@sdr.hu>

    This program is free software: you can redistribute it and/or modify
    it under the terms of the GNU Affero General Public License as
    published by the Free Software Foundation, either version 3 of the
    License, or (at your option) any later version.

    This program is distributed in the hope that it will be useful,
    but WITHOUT ANY WARRANTY; without even the implied warranty of
    MERCHANTABILITY or FITNESS FOR A PARTICULAR PURPOSE.  See the
    GNU Affero General Public License for more details.

    You should have received a copy of the GNU Affero General Public License
    along with this program.  If not, see <http://www.gnu.org/licenses/>.

    ++++++++++++++++++++++++++++++++++++++++++++++++++++++++++++++++++++++++

    In addition, as a special exception, the copyright holders
    state that config_rtl.py and config_webrx.py are not part of the
    Corresponding Source defined in GNU AGPL version 3 section 1.

    (It means that you do not have to redistribute config_rtl.py and
    config_webrx.py if you make any changes to these two configuration files,
    and use them for running your web service with OpenWebRX.)
"""

# NOTE: you can find additional information about configuring OpenWebRX in the Wiki:
#       https://github.com/simonyiszk/openwebrx/wiki

# ==== Server settings ====
web_port=8073
server_hostname="db0mhb.ampr.org" # If this contains an incorrect value, the web UI may freeze on load (it can't open websocket)
max_clients=4

# ==== Web GUI configuration ====
receiver_name="DB0MHB"
receiver_location="Muenchshofer Berg, Bavaria, Germany"
receiver_qra="JN69AF"
receiver_asl=510
receiver_ant="Longwire"
receiver_device="RedPitaya"
receiver_admin="dl8rds@darc.de"
receiver_gps=(49.243894,12.071711)
photo_height=510
photo_title="Panorama of Muenchshofer Berg"
photo_desc="""
You can add your own background photo and receiver information.<br />
Receiver is operated by: <a href="mailto:%[RX_ADMIN]">%[RX_ADMIN]</a><br/>
Device: %[RX_DEVICE]<br />
Antenna: %[RX_ANT]<br />
Website: <a href="http://localhost" target="_blank">http://localhost</a>
"""

# ==== sdr.hu listing ====
# If you want your ham receiver to be listed publicly on sdr.hu, then take the following steps:
# 1. Register at: http://sdr.hu/register
# 2. You will get an unique key by email. Copy it and paste here:
sdrhu_key = ""
# 3. Set this setting to True to enable listing:
sdrhu_public_listing = False

# ==== DSP/RX settings ====
fft_fps=9
fft_size=4096 #Should be power of 2
fft_voverlap_factor=0 #If fft_voverlap_factor is above 0, multiple FFTs will be used for creating a line on the diagram.

samp_rate = 500000
#samp_rate = 100000
#samp_rate = 1250000
center_freq = 7030000
#rf_gain = 1 #in dB. For an RTL-SDR, rf_gain=0 will set the tuner to auto gain mode, else it will be in manual gain mode.
#ppm = 0

audio_compression="adpcm" #valid values: "adpcm", "none"
fft_compression="adpcm" #valid values: "adpcm", "none"

digimodes_enable=True #Decoding digimodes come with higher CPU usage.
digimodes_fft_size=1024

start_rtl_thread=True

"""
Note: if you experience audio underruns while CPU usage is 100%, you can:
- decrease `samp_rate`,
- set `fft_voverlap_factor` to 0,
- decrease `fft_fps` and `fft_size`,
- limit the number of users by decreasing `max_clients`.
"""

# ==== I/Q sources ====
# (Uncomment the appropriate by removing # characters at the beginning of the corresponding lines.)

#################################################################################################
# Is my SDR hardware supported?                                                                 #
# Check here: https://github.com/simonyiszk/openwebrx/wiki#guides-for-receiver-hardware-support #
#################################################################################################

# You can use other SDR hardware as well, by giving your own command that outputs the I/Q samples... Some examples of configuration are available here (default is RTL-SDR):

# >> RTL-SDR via rtl_sdr
#start_rtl_command="rtl_sdr -s {samp_rate} -f {center_freq} -p {ppm} -g {rf_gain} -".format(rf_gain=rf_gain, center_freq=center_freq, samp_rate=samp_rate, ppm=ppm)
#format_conversion="csdr convert_u8_f"


#start_rtl_command="cat /tmp/osmocom_fifo"
#format_conversion=""


#lna_gain=8
#rf_amp=1
#start_rtl_command="hackrf_transfer -s {samp_rate} -f {center_freq} -g {rf_gain} -l{lna_gain} -a{rf_amp} -r-".format(rf_gain=rf_gain, center_freq=center_freq, samp_rate=samp_rate, ppm=ppm, rf_amp=rf_amp, lna_gain=lna_gain)
#format_conversion="csdr convert_s8_f"
"""
To use a HackRF, compile the HackRF host tools from its "stdout" branch:
 git clone https://github.com/mossmann/hackrf/
 cd hackrf
 git fetch
 git checkout origin/stdout
 cd host
 mkdir build
 cd build
 cmake .. -DINSTALL_UDEV_RULES=ON
 make
 sudo make install
"""

# >> Sound card SDR (needs ALSA)
# I did not have the chance to properly test it.
#samp_rate = 96000
#start_rtl_command="arecord -f S16_LE -r {samp_rate} -c2 -".format(samp_rate=samp_rate)
#format_conversion="csdr convert_s16_f | csdr gain_ff 30"

# >> /dev/urandom test signal source
# samp_rate = 2400000
# start_rtl_command="cat /dev/urandom | (pv -qL `python -c 'print int({samp_rate} * 2.2)'` 2>&1)".format(rf_gain=rf_gain, center_freq=center_freq, samp_rate=samp_rate)
# format_conversion="csdr convert_u8_f"

# >> Pre-recorded raw I/Q file as signal source
# You will have to correctly specify: samp_rate, center_freq, format_conversion in order to correctly play an I/Q file.
#start_rtl_command="(while true; do cat my_iq_file.raw; done) | csdr flowcontrol {sr} 20 ".format(sr=samp_rate*2*1.05)
#format_conversion="csdr convert_u8_f"

#>> The rx_sdr command works with a variety of SDR harware: RTL-SDR, HackRF, SDRplay, UHD, Airspy, Red Pitaya, audio devices, etc.
# It will auto-detect your SDR hardware if the following tools are installed:
# * the vendor provided driver and library,
# * the vendor-specific SoapySDR wrapper library,
# * and SoapySDR itself.
# Check out this article on the OpenWebRX Wiki: https://github.com/simonyiszk/openwebrx/wiki/Using-rx_tools-with-OpenWebRX/
#start_rtl_command="rx_sdr -F CF32 -s {samp_rate} -f {center_freq} -p {ppm} -g {rf_gain} -".format(rf_gain=rf_gain, center_freq=center_freq, samp_rate=samp_rate, ppm=ppm)
#format_conversion=""

# >> gr-osmosdr signal source using GNU Radio (follow this guide: https://github.com/simonyiszk/openwebrx/wiki/Using-GrOsmoSDR-as-signal-source)
#start_rtl_command="cat /tmp/osmocom_fifo"
#format_conversion=""

# ==== Misc settings ====

shown_center_freq = center_freq #you can change this if you use an upconverter

client_audio_buffer_size = 7
#increasing client_audio_buffer_size will:
# - also increase the latency
# - decrease the chance of audio underruns

start_freq = center_freq
start_mod = "cw" #nfm, am, lsb, usb, cw

iq_server_port = 4951 #TCP port for ncat to listen on. It will send I/Q data over its connections, for internal use in OpenWebRX. It is only accessible from the localhost by default.

#access_log = "~/openwebrx_access.log"

# ==== Color themes ====

#A guide is available to help you set these values: https://github.com/simonyiszk/openwebrx/wiki/Calibrating-waterfall-display-levels

### default theme by teejez:
waterfall_colors = "[0x000000ff,0x0000ffff,0x00ffffff,0x00ff00ff,0xffff00ff,0xff0000ff,0xff00ffff,0xffffffff]"
waterfall_min_level = -88 #in dB
waterfall_max_level = -20
waterfall_auto_level_margin = (5, 40)
### old theme by HA7ILM:
#waterfall_colors = "[0x000000ff,0x2e6893ff, 0x69a5d0ff, 0x214b69ff, 0x9dc4e0ff,  0xfff775ff, 0xff8a8aff, 0xb20000ff]"
#waterfall_min_level = -115 #in dB
#waterfall_max_level = 0
#waterfall_auto_level_margin = (20, 30)
##For the old colors, you might also want to set [fft_voverlap_factor] to 0.

#Note: When the auto waterfall level button is clicked, the following happens:
#   [waterfall_min_level] = [current_min_power_level] - [waterfall_auto_level_margin[0]]
#   [waterfall_max_level] = [current_max_power_level] + [waterfall_auto_level_margin[1]]
#
#   ___|____________________________________|____________________________________|____________________________________|___> signal power
#        \_waterfall_auto_level_margin[0]_/ |__ current_min_power_level          | \_waterfall_auto_level_margin[1]_/
#                                                      current_max_power_level __|

# 3D view settings
mathbox_waterfall_frequency_resolution = 128 #bins
mathbox_waterfall_history_length = 10 #seconds
mathbox_waterfall_colors = "[0x000000ff,0x2e6893ff, 0x69a5d0ff, 0x214b69ff, 0x9dc4e0ff,  0xfff775ff, 0xff8a8aff, 0xb20000ff]"

# === Experimental settings ===
#Warning! The settings below are very experimental.
csdr_dynamic_bufsize = False # This allows you to change the buffering mode of csdr.
csdr_print_bufsizes = False  # This prints the buffer sizes used for csdr processes.
csdr_through = False # Setting this True will print out how much data is going into the DSP chains.

nmux_memory = 50 #in megabytes. This sets the approximate size of the circular buffer used by nmux.

#Look up external IP address automatically from icanhazip.com, and use it as [server_hostname]
"""
print "[openwebrx-config] Detecting external IP address..."
import urllib2
server_hostname=urllib2.urlopen("http://icanhazip.com").read()[:-1]
print "[openwebrx-config] External IP address detected:", server_hostname
"""
#start_rtl_command="osmocat.py --args '{device_args}' --mode {gain_mode} --freq {center_freq} --rate {samp_rate}".format(center_freq=center_freq, samp_rate=samp_rate,gain_mode=gain_mode,device_args=device_args)
#format_conversion=""
device_args ="redpitaya=44.225.41.10:1001"
#gain_mode = 1
#start_rtl_command="rtl_sdr -s {samp_rate} -f {center_freq} -p {ppm} -g {rf_gain} -".format(rf_gain=rf_gain, center_freq=center_freq, samp_rate=samp_rate, ppm=ppm)

start_rtl_command=("./osmocat.py ""--args {device_args} ""--auto"" ""--freq {center_freq} ""--rate {samp_rate}").format(center_freq=center_freq, samp_rate=samp_rate, device_args=device_args)
format_conversion=""
Besides that, accessing the Red Pitaya is also quite simple. We are also using GQRX to connect to it. See below.
Here is how the perspective on the processes looks like:
root      2883     1  0 Mar20 ?        00:00:07 tmux new -d -s openwebrx-session bash -c "cd /usr/local/git/openwebrx; ./openwebrx.py; bash"
root      2884  2883  0 Mar20 pts/0    00:00:00 bash -c cd /usr/local/git/openwebrx; ./openwebrx.py; bash
root      2886  2884  0 Mar20 pts/0    00:52:39 /usr/bin/python2 ./openwebrx.py
root      2887     1  0 Mar20 ttyS0    00:00:00 /sbin/agetty -L 115200 ttyS0 linux
root      2888     1  0 Mar20 tty1     00:00:00 /sbin/agetty --noclear tty1 linux
root      2891     2  0 Mar20 ?        00:00:13 [kworker/u9:2]
root      2904  2886  0 Mar20 pts/0    00:00:00 /bin/sh -c ./osmocat.py --args redpitaya=44.225.41.10:1001 --auto --freq 7030000 --rate 500000| nmux --bufsize 126976 --bufcnt 394 --port 4951
root      2905  2904  4 Mar20 pts/0    19:37:29 /usr/bin/python2.7 ./osmocat.py --args redpitaya=44.225.41.10:1001 --auto --freq 7030000 --rate 500000
root      2906  2904  1 Mar20 pts/0    05:49:09 nmux --bufsize 126976 --bufcnt 394 --port 4951 --address 127.0.0.1
root      2912  2886  0 Mar20 pts/0    00:00:00 /bin/sh -c nc -v 127.0.0.1 4951 | csdr fft_cc 4096 55555 | csdr logpower_cf -70 | csdr fft_exchange_sides_ff 4096 | csdr compress_fft_adpcm_f_u
root      2913  2912  2 Mar20 pts/0    09:20:43 nc -v 127.0.0.1 4951
root      2914  2912  2 Mar20 pts/0    10:31:10 csdr fft_cc 4096 55555
root      2915  2912  0 Mar20 pts/0    01:11:13 csdr logpower_cf -70
root      2916  2912  0 Mar20 pts/0    00:34:13 csdr fft_exchange_sides_ff 4096
root      2917  2912  0 Mar20 pts/0    00:40:53 csdr compress_fft_adpcm_f_u8 4096
3.6 Observations
It is obvious, that the Red Pitaya cannot serve different clients on different frequencies and different sampling speeds at the same time. So it is necessary to make sure that only one client connects to it simultaneously.
It is also obvious that modifying the operation mode in the Pitaya's web interface is also not beneficial. For this reason it is a good piece of advice to ban other users from accessing it. I decided to use a firewall rule in my station's router to keep unwanted users out.
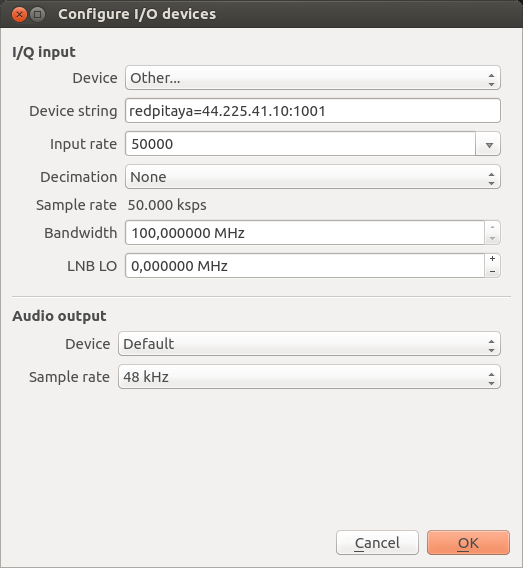
Accessing it with GQRX is really fantastic and will give us a great RF insight.
The configuration of the GQRX address therefore is simple:
4 Images
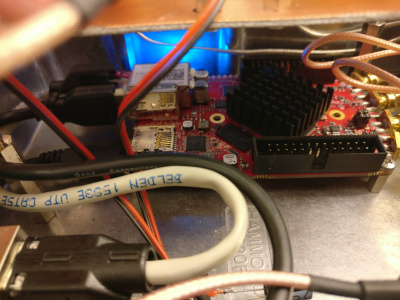
4.1 With the crappy Chinese preamps
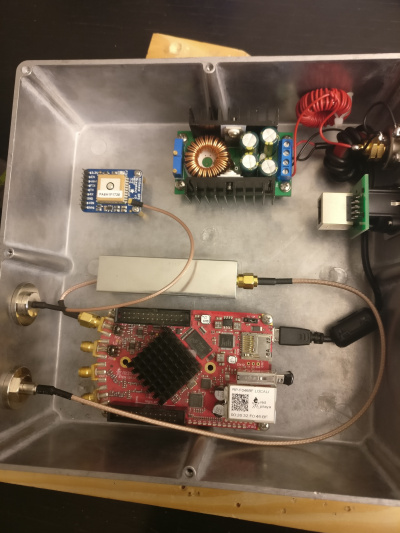
4.2 Without the crappy Chinese preamps
(to be added soon)
