Wassermelder mit Ölmelder
Aus DL8RDS Wiki
(Weitergeleitet von Water and Oil Alarm)
Inhaltsverzeichnis
1 Projektberschreibung
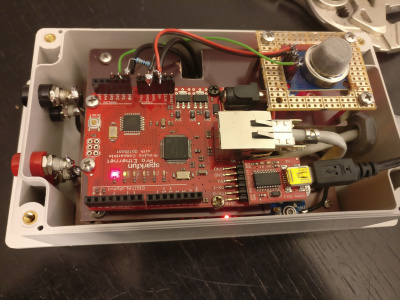
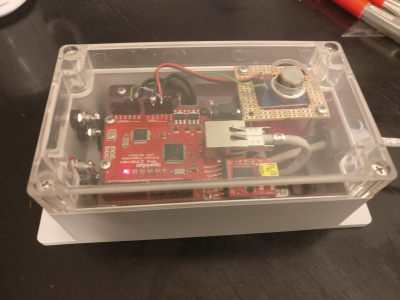
Das gebaute Gerät soll erkennen, ob ein Öltank leckt. Da am Boden des Öltanks Wasser vermutet wird, soll ein Wassermelder angesteuert werden, zudem sollen Dämpfe detektiert werden.
This device will detect if an oil tank is leaking. It will measure methane (CH4) gas and it will be triggered by a water sensor.
2 Komponenten
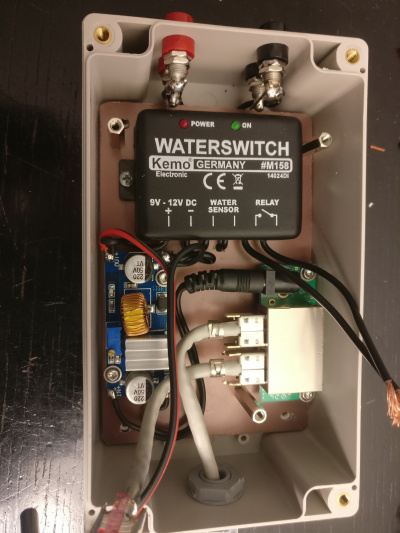
Here are the components I was using:
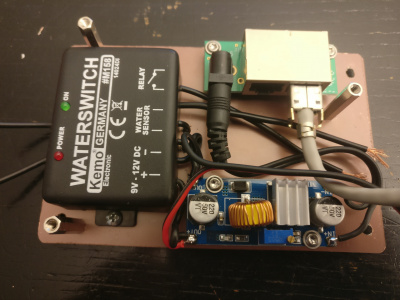
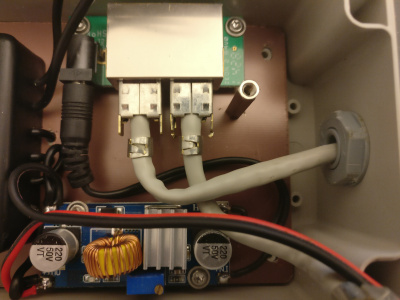
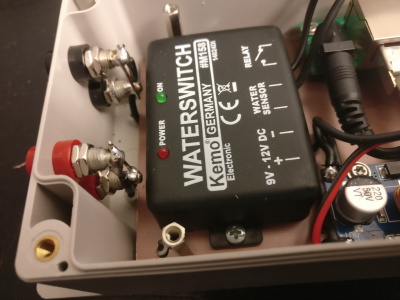
- Kunststoffgehäuse
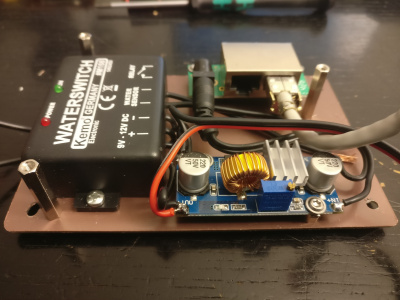
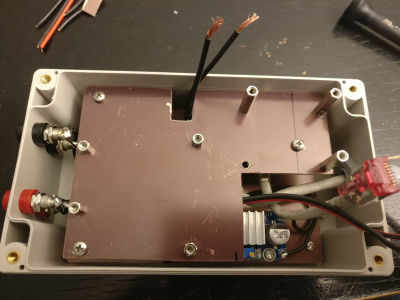
- 2 Platinen
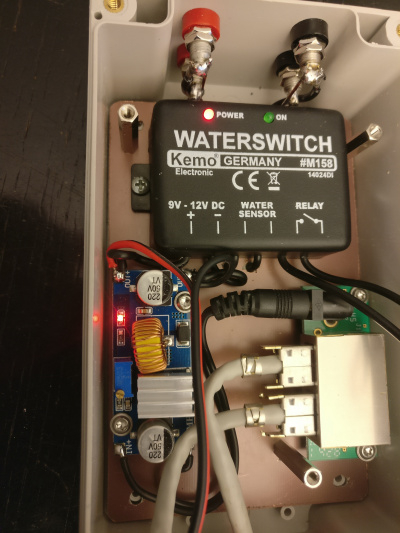
- Kemo Waterswitch https://www.voelkner.de/products/83008/Kemo-Wassermelder-Baustein-M158-9-V-DC-12-V-DC.html
- Passiv PoE Injektor https://www.mikrotik-shop.de/Stromversorgung/Gigabit-PoE-Injector-schwarz::1617.html
- DC DC Wandler (LM 2596 DC -DC Buck converter) https://www.youtube.com/watch?v=QPntXt8Ea3s
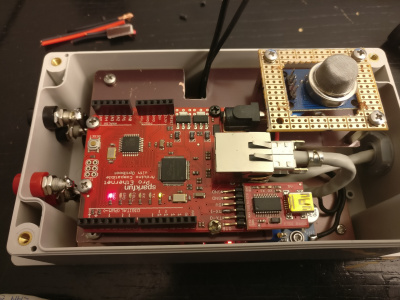
- MQ2 Detektor https://www.watterott.com/de/Analog-Smoke/LPG/CO-Gas-Sensor-MQ2
- 5V FTDI Breakout https://www.sparkfun.com/products/9716
- Arduino Ethernet Pro https://www.sparkfun.com/products/retired/10536
- Abstandshalter aus Metall
- Selbstsichernde Muttern M3
- Diverse Schrauben M3
3 Hilfreiche Links
Useful links:
- https://lastminuteengineers.com/mq2-gas-senser-arduino-tutorial/
- MQ2 Datasheet: https://www.pololu.com/file/0J309/MQ2.pdf
4 Software
Es wurde der Webserver-Sketch verwendet, mit einer geringfügigen Abwandlung.
Here is the sketch I was using for the Arduino.
#include <SPI.h>
#include <Ethernet.h>

// Enter a MAC address and IP address for your controller below.
// The IP address will be dependent on your local network:
byte mac[] = {
  0xEA, 0xA1, 0x23, 0x04, 0xFE, 0xED };
IPAddress myIP;

// Initialize the Ethernet server library
// with the IP address and port you want to use
// (port 80 is default for HTTP):
EthernetServer server(80);


void setup() {

 // Open serial communications and wait for port to open:
  Serial.begin(9600);
   while (!Serial) {
    ; // wait for serial port to connect. Needed for Leonardo only
  }


  // start the Ethernet connection and the server:
  myIP = Ethernet.begin(mac);
//  while (!myIP) {
//    ;
//  }

  server.begin();
  Serial.print("server is at ");
  Serial.println(Ethernet.localIP());

}


void loop() {
  // listen for incoming clients
  EthernetClient client = server.available();
  if (client) {
    Serial.println("new client");
    // an http request ends with a blank line
    boolean currentLineIsBlank = true;
    while (client.connected()) {
      if (client.available()) {
        char c = client.read();
        Serial.write(c);
        // if you've gotten to the end of the line (received a newline
        // character) and the line is blank, the http request has ended,
        // so you can send a reply
        if (c == '\n' && currentLineIsBlank) {
          // send a standard http response header
          client.println("HTTP/1.1 200 OK");
          client.println("Content-Type: text/html");
          client.println("Connection: close");  // the connection will be closed after completion of the response
	  client.println("Refresh: 5");  // refresh the page automatically every 5 sec
          client.println();
          client.println("<!DOCTYPE HTML>");
          client.println("<html>");
          // output the value of each analog input pin
          int wassersensor = analogRead(0);
          if (wassersensor > 512) {
            client.print("WASSERSENSOR: ALARM: WASSERSENSOR AKTIV<br/>");
            Serial.println("WASSERSENSOR: ALARM: WASSERSENSOR AKTIV");
          } else {
            client.print("WASSERSENSOR: OK</br>");
            Serial.println("WASSERSENSOR: OK");
          }
          int gassensor = analogRead(1);
          client.print("GASSENSOR: ");
          client.print(gassensor);
          client.print("<br/>");
          Serial.print("GASSENSOR: ");
          Serial.print(gassensor);

          client.println("</html>");
          break;
        }
        if (c == '\n') {
          // you're starting a new line
          currentLineIsBlank = true;
        }
        else if (c != '\r') {
          // you've gotten a character on the current line
          currentLineIsBlank = false;
        }
      }
    }
    // give the web browser time to receive the data
    delay(1);
    // close the connection:
    client.stop();
    Serial.println("client disonnected");
  }
}
5 Erfahrungswerte
- Auch wenn auf dem Arduino drauf steht, daß er mit bis zu 12 Volt versorgt werden kann, sollte er nur mit Spannungen unter 9V betrieben werden. Das KEMO Modul arbeitet mit Spannungen von ab 8 Volt, daher ergibt sich ein Spannungsbereich von 1 Volt, mit dem beide Komponenten miteinander betrieben werden können. Der DC Wandler kann auf diesen Spannungsbereich eingestellt werden.
- Dies ist vor allem aus Rücksicht über die hohe Abwärme-Abgabe des Spannungswandlers auf dem Arduino selbst und die hohe Abwärme des WizNet-Chips sinnvoll.
- Auf den Eingang des Kemo-Schalters am Arduino (Analog Index 0) habe ich einen 100kOhm Widerstand gegen Masse als PullDown gesetzt.
- Das FTDI-Interface wird zu Wartungszwecken aufgesetzt verwendet.
- Die Wärmeabgabe durch den WizNet Chip ist mit Blick auf die Zirkulation zum MQ2 vermutlich ganz sinnvoll.
- Der MQ2 Sensor wird auch ganz schön warm, aber das ist betriebsbedingt notwendig.
6 Ideen
After some weeks of operation I have come to the following desirable enhancements. I am not going to implement them, as I am happy that everything works for now and I am a little short of time to integrate it.
- Test alarm: The device should have a way to trigger a test alarm. It can only set off a hot alarm, there is no way to simulate an alarm and test the entire chain.
- I figure out, it should have kind of a push button that toggles a test alarm state for around a minute and a LED that indicates that the test alarm is active.
- The minimum test phase of one minute should be kept up because the signalling logic (CRON driven) has a maximum latency of one minute. The device is queried every minute, so it may take some time.
- Optical alarm indicator: In case there is an alarm, you won't see it if you look at the device. There is no immediate feedback. This is also not the case if you verify if the device works. Such a check will always trigger a real, accoustic alarm.
