Red Pitaya Remote Receiver Station: Unterschied zwischen den Versionen
Dl8rds (Diskussion | Beiträge) (→Getting OpenWebRX to connect to the Red Pitaya) |
Dl8rds (Diskussion | Beiträge) (→UNSUCCESSFUL: Getting OpenWebRX to connect to the Red Pitaya) |
||
| Zeile 237: | Zeile 237: | ||
WARNING: sync read failed. -5 | WARNING: sync read failed. -5 | ||
WARNING: sync read failed. -5 | WARNING: sync read failed. -5 | ||
| + | |||
| + | |||
| + | |||
| + | === SUCCESSFUL: Getting OpenWebRX to connect to the Red Pitaya === | ||
== Images == | == Images == | ||
Version vom 7. April 2019, 17:08 Uhr
Inhaltsverzeichnis
1 Project Scope
The goal of this project is to set up a remote controlled shortwave receiver station that is connectable via HAMNET.
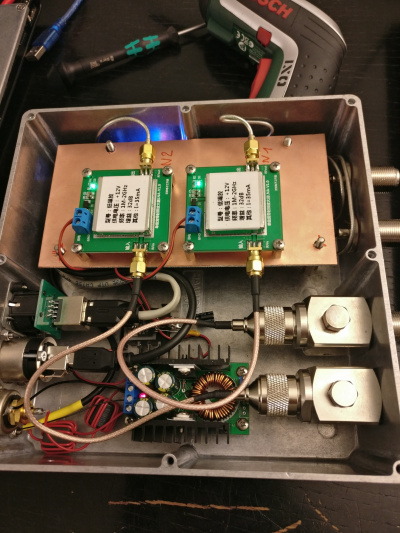
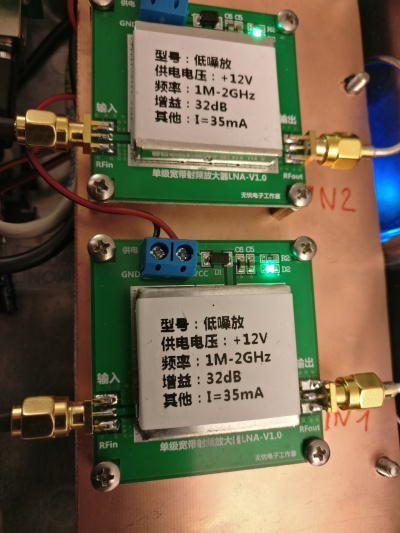
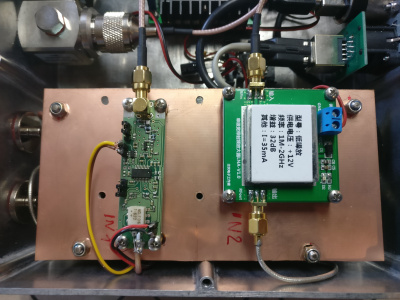
First, I installed two Chinese wideband preamplifiers. Later I heard that there was a special kit from Box73 / FUNKAMATEUR that did the job much better. My observation with the Chinese preamp was that the input of the SDR was highly overloaded, so I needed one with an adjustable amplification. Please check the instruction: http://www.box73.de/download/bausaetze/BZ-100.pdf
Once deployed, I understood that I needed to install Pavel Demon's firmware. Since the deployment at DB0MHB is a little out of reach, I needed to log into my Red Pitaya and make sure that the installation files go to the right place. I decided to build a deb package so that this job was easier.
The final goal is to have a recording / monitoring receiver that can fully be remote-controlled. The Pitaya can be switched on and off with the remote control switch described here: A relay box for control from Linux and A remote Ethernet switch for my relay box
Note: Big Thanks to Johannes DO6JS, who finally found out the last tricks to get everything running.
2 Component List
- Aluminium diecast case HAMMOND 1550F: 50 €
- Red Pitaya: 235 €
- Neutrik socket Cinch (power supply): 10 €
- Neutrik socket USB thru: 10 €
- Neutrik socket Ethernet thru: 10 €
- 25cm USB cable: 2 €
- 2x Telegärtner Lightning protection: 2x 50 €
- 2x pigtail N-SMA: 5 €
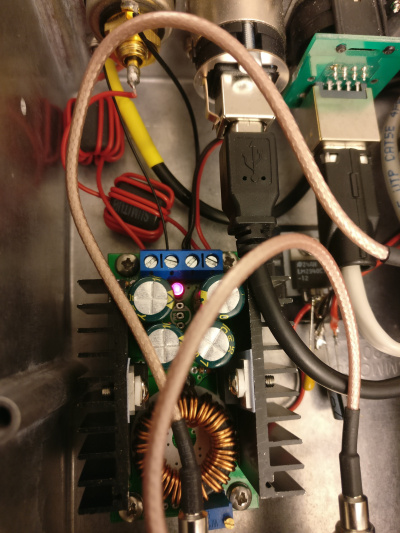
- DC DC Converter: 10 €
- Chinese wideband preamplifier: 10 €
- FUNKAMATEUR preamplifier specially designed for Red Pitaya: 50 €
- Teflon cable with SMA plug: 5 €
- Semi Rigid SMA/SMA: 5 €
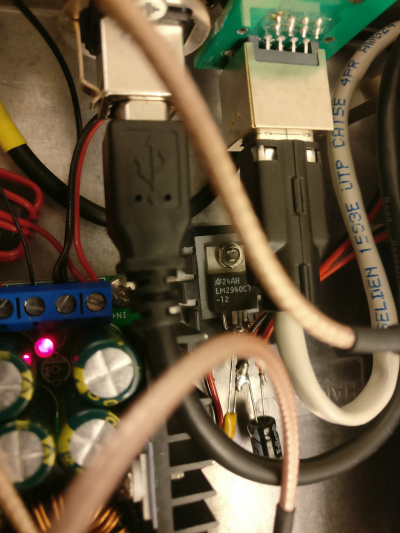
- Voltage Limiter IC for 12V: 3 €
- LM2940L-12 ensuring that possible input voltage spikes will not damage my preamp
- 2x Ferrite Core: 3 €
- 2x N socket with pigtail: 10 €
- 1 PCB: 1 €
- M4 spacers: 5 €
- M3 spacers: 5 €
Overall total: 529 €
3 Software Stuff
3.1 Accessing the amplifier
First detect the preamp:
i2cdetect -y -r 0
     0  1  2  3  4  5  6  7  8  9  a  b  c  d  e  f
00:          -- -- -- -- -- -- -- -- -- -- -- -- --
10: -- -- -- -- -- -- -- -- -- -- -- -- -- -- -- --
20: -- -- -- -- -- -- -- -- -- -- -- -- -- -- -- --
30: -- -- -- -- -- -- -- -- -- -- -- -- -- -- -- --
40: -- -- -- -- -- -- -- -- -- -- -- -- -- -- -- --
50: UU -- -- -- -- -- -- -- -- -- -- -- -- -- -- --
60: 60 -- -- -- -- -- -- -- -- -- -- -- -- -- -- --
70: -- -- -- -- -- -- -- --
60h is the address of the preamp.
Now read out the dac register as word:
i2cget -y 0 0x60 0 w
0x80c0
Set the amplification to max:
i2cset -y 0 0x60 0 0xC0 0x0f 0xff i
Set the amplification to min:
i2cset -y 0 0x60 0 0xC0 0x0 0x0 i
Values between 0 and 4095 are possible. Convert to hex.
3.2 UNSUCCESSFUL: Getting the interface right
Firstly, unless there is some special configuration on the Pitaya, you should be able to detect ot from another machine.
In our case, we are using a Raspberry Pi for OpenWebRX and the Pitaya for receiving.
This is some background info, but not applicable in our case since we are using the Soapy toola below...:
http://pavel-demin.github.io/red-pitaya-notes/sdr-receiver/
So we needed to implement this on the Raspberry Pi:
#Installing SoapySDR:
git clone https://github.com/pothosware/SoapySDR
cd SoapySDR
mkdir build
cd build
cmake ..
make
sudo make install
sudo ldconfig
cd ..
#Installing rx_tools:
git clone https://github.com/rxseger/rx_tools
cd rx_tools
mkdir build
cd build
cmake ..
make
sudo make install
sudo ldconfig
cd ..
git clone https://github.com/pothosware/SoapyRedPitaya.git
cd SoapyRedPitaya
mkdir build
cd build
cmake ..
make
sudo make install
git clone https://github.com/pothosware/SoapyRemote.git
cd SoapyRemote
mkdir build
cd build
cmake ..
make
sudo make install
I also decided to install the remote component on the Red Pitaya, just the same way as given above.
Please check the following link for instructions:
https://github.com/pothosware/SoapyRemote/wiki
The detection should work then on the Raspberry Pi with the following command. Note that the IP 44.225.41.10 is our Red Pitaya.
SoapySDRUtil --probe="driver=redpitaya, addr=44.225.41.10"
giving the following result:
######################################################
## Soapy SDR -- the SDR abstraction library
######################################################

Probe device driver=redpitaya, addr=44.225.41.10

----------------------------------------------------
-- Device identification
----------------------------------------------------
  driver=redpitaya
  hardware=redpitaya

----------------------------------------------------
-- Peripheral summary
----------------------------------------------------
  Channels: 1 Rx, 1 Tx
  Timestamps: NO

----------------------------------------------------
-- RX Channel 0
----------------------------------------------------
  Full-duplex: YES
  Supports AGC: NO
  Stream formats: CF32
  Native format: CF32 [full-scale=1]
  Full gain range: [0, 0] dB
  Full freq range: [0.05, 60] MHz
    RF freq range: [0.05, 60] MHz
  Sample rates: 0.02, 0.05, 0.1, 0.25, 0.5, 1.25 MSps

----------------------------------------------------
-- TX Channel 0
----------------------------------------------------
  Full-duplex: YES
  Supports AGC: NO
  Stream formats: CF32
  Native format: CF32 [full-scale=1]
  Full gain range: [0, 0] dB
  Full freq range: [0.05, 60] MHz
    RF freq range: [0.05, 60] MHz
  Sample rates: 0.02, 0.05, 0.1, 0.25, 0.5, 1.25 MSps
Alternatively I installed SoapyRemote on the RedPitaya and it seems I can access it additionally through the remote driver:
root@db0rc:~# SoapySDRUtil --find="remote=44.225.41.10, remote:driver=redpitaya"
######################################################
## Soapy SDR -- the SDR abstraction library
######################################################

Found device 0
  driver = remote
  remote = tcp://44.225.41.10:55132
  remote:driver = redpitaya
3.3 UNSUCCESSFUL: Getting OpenWebRX to connect to the Red Pitaya
Since we now can access the Pitaya via a standard interface, it's time to configure OpenWebRX accordingly:
The following link will provide some partly applicable support:
https://github.com/simonyiszk/openwebrx/wiki/Setting-up-OpenWebRX-on-a-Raspberry-Pi-2
This is also helpful:
https://forum.redpitaya.com/viewtopic.php?f=8&t=1911
And this is extremely helpful:
https://github.com/pothosware/SoapySDR/wiki
Even though I don't know for now if the SoapyRemote was really necessary, I was able to find the pitaya with the command
SoapySDRUtil --find="driver=redpitaya, addr=44.225.41.10"
I can also find the RedPitaya with the command
SoapySDRUtil --probe="remote=tcp://44.225.41.10:55132,driver=redpitaya"
Now it's necessary to inject this kind of configuration into the OpenWebRX config. Therefore I had to "make" the device:
SoapySDRUtil --make="remote=tcp://44.225.41.10:55132,driver=redpitaya"
... Resulting in the creation of a device with the index 0:
Here is what I entered in the section "I/Q sources":
soapy_device_query="0" #can be a number or can correspond to a driver, e.g. soapy_device_query="driver=hackrf", see `rx_sdr --help`
start_rtl_command="rx_sdr -d {device_query} -F CF32 -s {samp_rate} -f {center_freq} -p {ppm} -g {rf_gain} -".format(device_query=soapy_device_query, rf_gain=rf_gain, center_freq=center_freq, samp_rate=samp_rate, ppm=ppm)
format_conversion=""
The execution of the following command gives me an error:
rx_sdr -d "0" -F CF32 -s 1250000 -f 7000000 -p 0 -g 5 -
WARNING: sync read failed. -5
WARNING: sync read failed. -5
WARNING: sync read failed. -5
