NTP-Server with Raspberry Pi and Sure Electronics GPS Eval board
Inhaltsverzeichnis
1 Scope
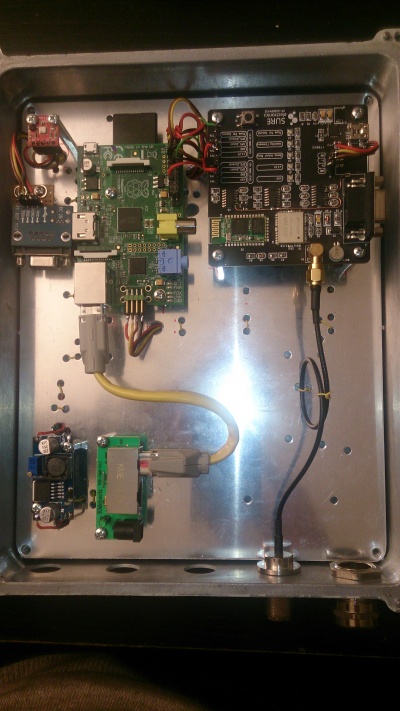
It was already a few years ago when I bought a Sure Electronics GPS timing receiver. Though, there was never enough time to complete and deploy it. I have done it now.
The Sure receiver is nice because it has 3,3V IO pins, and this matches perfectly with a Raspberry Pi. So it's a good point using it.
Obviously many people have problems with the NTPD that comes with the recent raspian distributions: ntp 4.2.6p5. It does not support PPS...
It is rather easy to make the kernel PPS aware, but ntp still is not capable of using it. I needed to recompile the ntp package so that I was able to use it. The symptom therefore is:
- The tool ppstest does report the reception of a pulse, but even if you configure NTP correctly, it won't give you an output with PPS using the command ntpq -p.
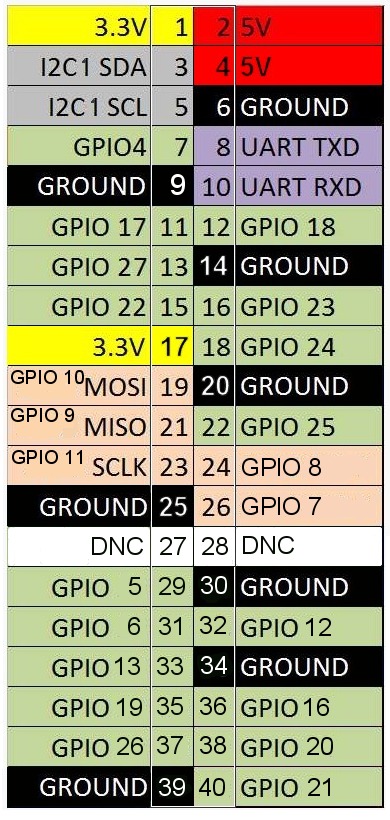
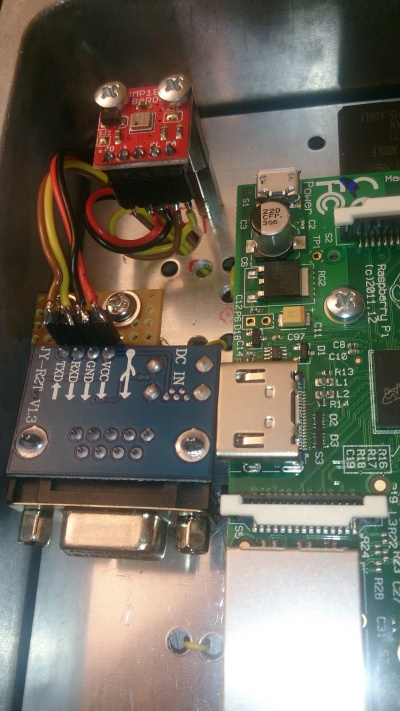
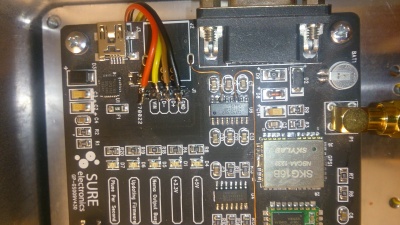
- Please note that I am reading the PPS through GPIO Pin 18 and the regular NMEA sentence comes via the serial port. I am not using the onboard UART, but I rather connect the /dev/ttyUSB0.
Note that there is a successor project which is closely related: NTP-Server with Raspberry Pi and Trimble Resolution SMT
2 References
- http://www.satsignal.eu/ntp/Sure-GPS.htm Here the board is described very well
- http://www.satsignal.eu/ntp/Raspberry-Pi-NTP.html
- https://store.uputronics.com/index.php?route=product/product&path=60_64&product_id=81
- http://rdlazaro.info/compu-Raspberry_Pi-RPi-stratum0.html
- http://mythopoeic.org/pi-ntp/
- https://raspberry.tips/raspberrypi-tutorials/raspberry-pi-uhrzeit-ueber-gps-beziehen-zeitserver/
3 Implementation
3.1 OS Installation and Preparation
First of all I decided to use a minibian image:
https://sourceforge.net/projects/minibian/files/2016-03-12-jessie-minibian.tar.gz
because I don't want to create a really big thing. I just want to have an NTP server.
- Unpack, write it to the SD card, as described so often everywhere on almost every RPI page.
- Use gparted to resize the root partition to the rest of your SD card. We should not waste space.
- Log in using uid root pwd raspberry (default). Note that opposed to Raspian, there is no user "pi".
- apt-get update; apt-get upgrade and update the minibian image.
- Give it a nice hostname, editing the file /etc/hostname and reboot.
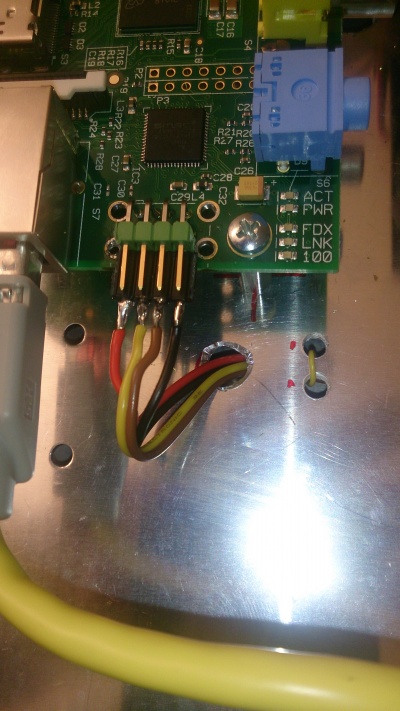
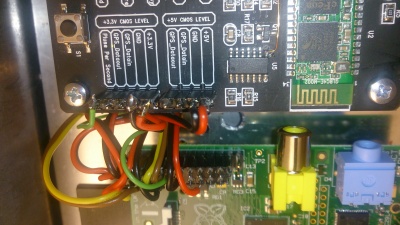
- Edit /boot/config.txt - Add dtoverlay=pps-gpio,gpiopin=18 on a new line. - Connect the PPS signal of the Sure board to this pin. Don't get the pin wrong :-)
- I also added another line to the boot'config.txt file: dtparam=i2c_arm=on because I have included an I2C sensor that gives me some more values.
Here is why: http://stackoverflow.com/questions/32021924/raspberry-pi-2-cannot-enable-dev-i2c-0
- Save the file...
- Edit the file /etc/modules to contain the following lines. Just paste them below what is there already:
i2c-bcm2708
i2c_dev
pps-gpio
- so to ensure that these modules will be loaded.
- Install the pps-tools:
apt-get install pps-tools
If you are using a BMP085 or a BMP180 sensor to grab some data as I do, then do this:
- Install the according i2c devices:
apt-get update
apt-get install i2c-tools      # I2C-Toolkit for commandline
apt-get install python-smbus   # Python library for I2C
apt-get install libi2c-dev     # library for C
apt-get install git            # need this later...
- Note here (German): http://www.netzmafia.de/skripten/hardware/RasPi/RasPi_I2C.html
- Configure the timezone using the command dpkg-reconfigure tzdata
- Create a symlink from /dev/ttyUSB0 to /dev/gps0 because the latter is the device the NTP driver will be looking for:
lrwxrwxrwx 1 root root 7 Apr 10 23:47 /dev/gps0 -> ttyUSB0
Now reboot. A device will be created during system startup: /dev/pps0 Check for it to be created. Another device will be created for the I2C stuff, see below.
If you connected the PPS, the following command will produce results like here:
root@ntp1:/etc# ppstest /dev/pps0
trying PPS source "/dev/pps0"
found PPS source "/dev/pps0"
ok, found 1 source(s), now start fetching data...
source 0 - assert 1460368282.999995290, sequence: 43451 - clear  0.000000000, sequence: 0
source 0 - assert 1460368284.000007548, sequence: 43452 - clear  0.000000000, sequence: 0
source 0 - assert 1460368284.999994807, sequence: 43453 - clear  0.000000000, sequence: 0
source 0 - assert 1460368285.999995063, sequence: 43454 - clear  0.000000000, sequence: 0
If you get one of these lines every second, this means that your kernel is now disciplined by a PPS. It reacts to the pulse coming in, it recognizes the pulse properly. Congratulations!
Now let's check for the I2C stuff: The device /dev/i2c-1 should have been created. If you also use the BMP sensor, you should find it as '77'. Once you got the sensor connected as described in the manuals, detect it:
i2cdetect -y 1
and it should show up as "77":
     0  1  2  3  4  5  6  7  8  9  a  b  c  d  e  f
00:          -- -- -- -- -- -- -- -- -- -- -- -- --
10: -- -- -- -- -- -- -- -- -- -- -- -- -- -- -- --
20: -- -- -- -- -- -- -- -- -- -- -- -- -- -- -- --
30: -- -- -- -- -- -- -- -- -- -- -- -- -- -- -- --
40: -- -- -- -- -- -- -- -- -- -- -- -- -- -- -- --
50: -- -- -- -- -- -- -- -- -- -- -- -- -- -- -- --
60: -- -- -- -- -- -- -- -- -- -- -- -- -- -- -- --
70: -- -- -- -- -- -- -- 77
Great!
Then you can proceed to download Lady Ada's code examples:
git clone https://github.com/adafruit/Adafruit-Raspberry-Pi-Python-Code.git
and then try it out:
cd Adafruit-Raspberry-Pi-Python-Code/Adafruit_BMP085
./Adafruit_BMP085_example.py
Temperature: 25.29 C
Pressure:    974.22 hPa
Altitude:    530
Now let's go back for the NTP application.
Note: The structure of the Adafruit repositories has changed recently. Now you can clone exclusively the BMP libraries with this command:
git clone https://github.com/adafruit/Adafruit_Python_BMP
But let me remark that I am having problems with this recent development. Well, it's probably not so complicated but I have not hafd the time to find out how it works.
3.2 NTP configuration
The default NTP package is not sufficient, as I wrote above. It does not support reading the PPS from the kernel. It is quite disappointing if you did everything right and you're still not successful.
Though I recommend installing it first because we can prepare it nevertheless, using the command apt-get install ntp
Then edit the config file /etc/ntp.conf and make it look like this. Maybe it's agood idea to copy it to another filename and to have a reference: cp /etc/ntp.conf /etc/ntp.conf_orig. Now edit the /etc/ntp.conf: root@ntp1:/etc# cat /etc/ntp.conf
# /etc/ntp.conf, configuration for ntpd; see ntp.conf(5) for help

driftfile /var/lib/ntp/ntp.drift

# Enable this if you want statistics to be logged.
statsdir /var/log/ntpstats/

statistics loopstats peerstats clockstats
filegen loopstats file loopstats type day enable
filegen peerstats file peerstats type day enable
filegen clockstats file clockstats type day enable
filegen sysstats  file sysstats  type day link enable

tos  minsane 3
tos  orphan 10
tos  mindist 0.4

server 127.127.22.0 minpoll 4 prefer
fudge 127.127.22.0 refid PPS flag2 0 flag3 1

server 127.127.20.0 minpoll 4 mode 18 prefer # NMEA serial port, 16 = 9600 baud, 2 = $GPGGA
fudge 127.127.20.0 time2 0.413  flag1 0  refid GPS stratum 1 flag3 1

#server 127.127.1.0
#fudge  127.127.1.0 stratum 10

pool de.pool.ntp.org minpoll 10 iburst

# Access control configuration; see /usr/share/doc/ntp-doc/html/accopt.html for
# details.  The web page <http://support.ntp.org/bin/view/Support/AccessRestrictions>
# might also be helpful.
#
# Note that "restrict" applies to both servers and clients, so a configuration
# that might be intended to block requests from certain clients could also end
# up blocking replies from your own upstream servers.

# By default, exchange time with everybody, but don't allow configuration.
restrict -4 default kod notrap nomodify nopeer noquery
restrict -6 default kod notrap nomodify nopeer noquery

restrict        172.16.0.0  mask 255.240.0.0
restrict        192.168.0.0 mask 255.255.0.0

# Local users may interrogate the ntp server more closely.
restrict 127.0.0.1
restrict ::1
Since NTP is frequently writing to the SD card, I did a trick. The creation of the mount point /var/log/ntpstats will be done during package installation.
- Stop the daemon with service ntp stop
- Now delete the contents of this directory: rm /var/log/ntpstats/*
- Now add the following line to the file /etc/fstab and create a RAM disk
tmpfs /var/log/ntpstats tmpfs nodev,nosuid,size=10M 0 0
- It will cost 10 of your 512 MB RAM, but you didn't plan a high performance compute cluster anyway :-) If you want, you can easily add more. Occasional reboots will keep it empty anyway.
- Note that the process ntpd just consumes about 5 MBytes... So 512 is almost a waste of RAM. :-)
- Reboot.
Now let's check a couple of things:
- mount will show something like this:
tmpfs on /var/log/ntpstats type tmpfs (rw,nosuid,nodev,relatime,size=10240k)
- ntpq -p will show something like this:
 root@ntp1:/etc# ntpq -p
      remote           refid      st t when poll reach   delay   offset  jitter
 ==============================================================================
 *GPS_NMEA(0)     .GPS.            1 l    7   16  377    0.000    1.300  11.017
 -test.danzuck.ch 162.23.41.56     2 u  712 1024  377   20.054   -0.302   1.833
 +stratum2-3.NTP. 129.70.130.70    2 u  288 1024  377   31.598    2.897   0.542
 +static.5-9-80-1 213.239.239.165  3 u  448 1024  377   21.270    1.829   0.854
 -ns2.bvc-cloud.d 109.75.188.245   3 u  212 1024  377   23.095    0.746   0.502
- Note that there is probably no line containing anything about PPS.
- Though this output already tells us that our NTP server is keeping a more or less precise time. Good enough for your alarm clock in the morning for sure :-)
- Now let's add PPS support. Here is a good reference page: https://raspberry.tips/raspberrypi-tutorials/raspberry-pi-uhrzeit-ueber-gps-beziehen-zeitserver/
- Since the recent minibian is based on jessie rather than on wheezy:
sh -c 'echo "deb-src http://mirrordirector.raspbian.org/raspbian/ jessie main contrib non-free rpi" >> /etc/apt/sources.list'
apt-get update
- Get the build dependencies and the source code of the package:
cd ~
apt-get -y build-dep ntp
apt-get -y source ntp
- The source code was stored in my home directory. In the moment and for me it is the version ntp-4.2.6.p5+dfsg. Note that it could be different for you.
cd ntp-4.2.6.p5+dfsg/debian/
- Edit the rules file and add the missing support for PPS/ATOM. Search for configure and append a line at the end of the statement. Don't forget the \ at the end of the previous line.
./configure CFLAGS='$(CFLAGS)' CPPFLAGS='$(CPPFLAGS)' LDFLAGS='$(LDFLAGS)' \
               --prefix=/usr \
               --enable-all-clocks --enable-parse-clocks --enable-SHM \
               --disable-debugging --sysconfdir=/var/lib/ntp \
               --with-sntp=no \
               --with-lineeditlibs=edit \
               --without-ntpsnmpd \
               --disable-local-libopts \
               --enable-ntp-signd \
               --disable-dependency-tracking \
               --with-openssl-libdir=/usr/lib/$(DEB_HOST_MULTIARCH) \
               --enable-ATOM
- Now add the changelog file so that it reflects the change:
ntp (1:4.2.6.p5+dfsg-7+deb8u1) jessie-security; urgency=medium
- into:
ntp (1:4.2.6.p5+dfsg-8+deb8u1) jessie-security; urgency=medium
- Now 'cd' into the package directory and build the package.
cd ..
sudo dpkg-buildpackage -b
- It will take a while now. In my case three deb files were created:
 344 -rw-r--r-- 1 root root  350362 Apr 11 02:11 ntp_4.2.6.p5+dfsg-8+deb8u1_armhf.deb
  68 -rw-r--r-- 1 root root   68882 Apr 11 02:11 ntpdate_4.2.6.p5+dfsg-8+deb8u1_armhf.deb
1008 -rw-r--r-- 1 root root 1030588 Apr 11 02:09 ntp-doc_4.2.6.p5+dfsg-8+deb8u1_all.deb
- Now install them:
cd ..
dpkg -i ntp_4.2.6.p5+dfsg-8+deb8u1_armhf.deb
dpkg -i ntpdate_4.2.6.p5+dfsg-8+deb8u1_armhf.deb
dpkg -i ntp-doc_4.2.6.p5+dfsg-8+deb8u1_all.deb
- Now restart the ntp server with the command service ntp restart and after ~ 1 minute it should give you this output using ntpq -p:
root@ntp1:~# ntpq -p
      remote           refid      st t when poll reach   delay   offset  jitter
 ==============================================================================
 oPPS(0)          .PPS.            0 l   16   16  377    0.000   -0.090   0.007
 *GPS_NMEA(0)     .GPS.            1 l   15   16  377    0.000   -4.357   5.950
 -static.249.171. 194.225.150.25   3 u  163 1024    3   20.506   -1.796   1.607
 +tschil.ethgen.c 131.188.3.222    2 u  175 1024    3   20.443   -0.381   0.988
 +malbolge.de     131.188.3.221    2 u  169 1024    3   20.930   -0.417   0.933
 -ghost-networks. 130.149.17.8     2 u  204 1024    3   22.189    0.102   0.769
- The 'o' at the beginning of the line says that PPS is being used.
- Please also check the output of ntptime:
root@ntp1:~# ntptime
ntp_gettime() returns code 0 (OK)
  time dab60019.f0feffcc  Mon, Apr 11 2016 12:51:05.941, (.941391075),
  maximum error 4827 us, estimated error 0 us, TAI offset 0
ntp_adjtime() returns code 0 (OK)
  modes 0x0 (),
  offset -76.297 us, frequency -37.570 ppm, interval 1 s,
  maximum error 4827 us, estimated error 0 us,
  status 0x2007 (PLL,PPSFREQ,PPSTIME,NANO),
  time constant 4, precision 0.001 us, tolerance 500 ppm,
- If you want to know how to interpret it, consider this (rather old) posting: https://groups.google.com/forum/#!topic/comp.protocols.time.ntp/FDAIxL3V-k4
Congratulations!
